How to install an eSIM?

Installing and activating your Connectivity eSIM is quick and easy. Follow these simple steps:

  1. Please ensure that your phone is connected to the internet
  2. Connect to our platform here using your web browser.
  3. Create an account or log in to your exising account.
  4. Select the travel eSIM plan that best suits your needs
  5. Follow the instructions in the platform to install your eSIM profile

IOS

1

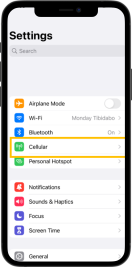
1. Go to Settings > Cellular

2

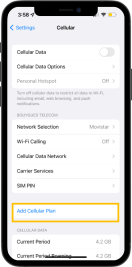
2. Select Add Celullar Plan

3

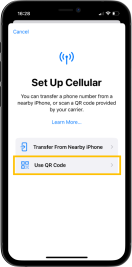
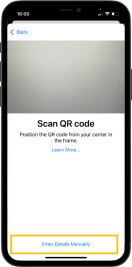
3. Use QR code

4

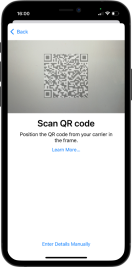
4. Scan the QR code sent by us to your email.

5

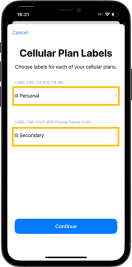
5. For Cellular Plan Labels, select personal for your own line, and secondary for your new eSIM line.

6

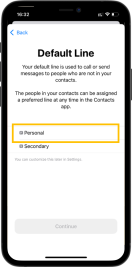
6. For Default Line, select personal.

7

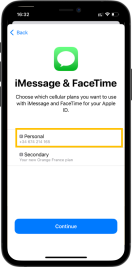
7. For iMessage & Facetime, select personal.

8

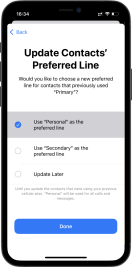
8. For Contacts´ Preferred Line, select: use “Personal” as the preferred line OR Update later.

9

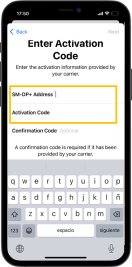
9. If the QR is not working, select ”Enter Details Manually”

10

10. Write de Address and Activation code provided to you in the purchase confirmation email.

Android

1

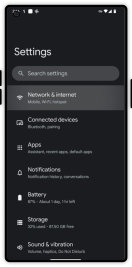
1. Go to Settings > Network & Internet

2

2. Tap “+” to add the eSIM.

3

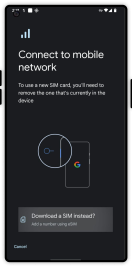
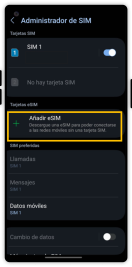
3. Tap Download a SIM instead?

4

4. Tap “Add eSIM”

5

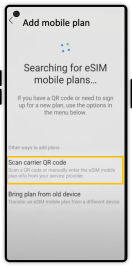
5. Select Scan carrier QR code

6

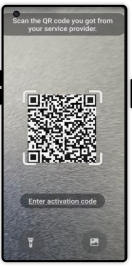
6. Scan the QR code sent by us to your email. If is not working, tap on “Enter activation code” , and write it. This was provided also to you.

7

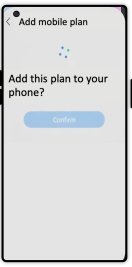
7. Tap confirm to finish the process.

After installing the eSIM please consider these tips:

  1. Make sure you have mobile data activated
  2. Make sure you have data roaming enabled of your new eSIM
  3. Do not forget to disable the option “allow mobile data change” to avoid high charges for roaming from your usual operator